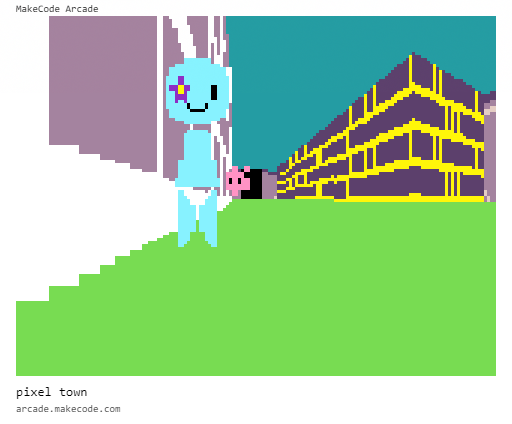
I know its been a full year, but is there any progress on the floor update?
can someone please make this compatible with random tile placement? like, the extension?
Right, here is an extension to add a ceiling, it can also make the sky move like sky! Here it is: GitHub - The-Code-Zone/Raycasting-pxt-extension: AqeeAqee’s raycasting extension now with ceiling rendering and MrFranko’s floor rendering
It also adds a floor!
great job now A D D S T A I R S /j
yeah also combine it with 3d models /j
And Lighting.
*The Raycasting extension with lighting is very outdated now
Is it possible to make something like a minecraft tree? For instance like stacking tiles basicly
nope , u can’t bcz only work in some engine
you could try in @Brohann’s 3d engine? Not in the raycasting engine, no. At least, i don’t think so.
yeah , but how does it work ?
I’m really fascinated by AqeeAqee’s raycasting extension. It’s over 700 lines, and I’m trying to understand how it’s structured at an engine level. I know how to use the blocks, but I’m not just here to call functions—I want to understand how all those lines work together efficiently.
I’m trying to build my own accurate isometric grid demo, and I want to understand the engine logic itself. Seeing the code helps, but just reading it doesn’t explain why certain patterns or structures were chosen. I want to learn how to organize hundreds of lines of engine-level logic so it’s maintainable and scalable.
Specifically, I’m curious about:
- How geometry is generated and tiles are rendered efficiently.
- How movement and controls are handled while keeping everything flexible.
- How the engine separates core logic from game logic.
I’m not asking for a line-by-line explanation—just guidance on how someone approaches building an engine at this scale. I want to know what techniques or design patterns help move between functions without getting lost in hundreds of lines.
I’m also applying this to my own extension, like building a “War 2” engine. I often spend a long time planning before coding, but I feel there’s more to learn about efficient engine structure, multi-line functions, and deep integration with MakeCode Arcade.
Here’s the raycasting file I’m studying: engine_raycasting.ts
I don’t want to just use the functions—they’re useful, but I want to understand what makes them work behind the scenes. The Render class is especially confusing; it uses multi-line functions and internal state that isn’t obvious at first glance. I want to understand the “why,” not just the “what.”
Some specific questions I have:
- How does the engine efficiently loop through tiles to decide what to render each frame?
- How does it avoid duplicating work when multiple objects or tiles need updates?
- How is control input integrated without cluttering the rendering logic?
My goal isn’t to copy the engine. I want to design my own engine-level systems, like in War 2, where functions, classes, and rendering logic are deeply connected but still readable. Any advice on:
- Planning multi-line functions before coding
- Structuring a large engine for maintainability
- Moving between functions logically like MakeCode does
Here’s my War2 extension (still feels like a base class/skeleton): War2 on GitHub
I’m also trying to make a “tiles hop” render game, but scaling alone isn’t enough. I need an advanced structure so the ball can hop with actual depth—not just using sprite.z, but true 2.5D Z. Here’s a screenshot of what I mean:
I tried scaling, but MakeCode only has width and height, so jumping with x and y is still 2D. I need true 3D vectors and structure to make the tiles hop properly.
Clarification on Z-depth:
When I say Z, I’m not talking about 2D layering (sprite.z) or fanmade perspective tricks. I mean actual 3D depth. For examples:
- Gameplay demo: YouTube playlist
- Using Z-depth in MakeCode: Forum post
I’ve tried some constants and tricks, but I still don’t know what the proper engine structure would be to make it all work. Any guidance on engine-level structure, Z-depth handling, and tile hopping would be hugely appreciated.
How to use the Brohann 3D extension
- Import the extension
- Go to Brohann3214/arcade-brohann-3d
- Paste the link in Search or Enter Project URL.
- Click Import when you see the Brohann 3D option. You’ll now see new 3D dimension blocks.
- Rotating your model
- Use the Set/Change X, Y, Z Angle blocks to rotate your shape.
- SetMesh is required first; it assigns your variable so you can apply indices and properties.
- Set flag controls which property of the mesh you’re modifying.
- Mesh properties let you define indices and other characteristics of your shape.
- Sorting method
- Use Set Sorten to choose between
accurateorfast.- Fast: Sorts quicker but may be less precise.
- Accurate: Slower but precise for rendering.
when i try to chhange the tiles with set tile to it doesnt work can someone help me there
Hello! I’m new here, i was wondering what I could add to this 3D boss battle game I made: https://arcade.makecode.com/S93172-09804-32111-95773
Welcome! ![]() WOW, this is already really great, the sound design adds a ton of suspense!
WOW, this is already really great, the sound design adds a ton of suspense!
The only thing I could think of that would add to the game for me would be some backstory on why we should defeat the boss (ex. show us why they are evil or need to be stopped) that way we have a motivation to complete the game!
Thank you, I never thought this reply was going to be viewed :), anyways… My Idea was: a silly boss battle with a giant cat called Bob. The game is suposed to be similar to garn47! (i’m still working on the backstory)


