Hey folks!
Wow, it’s been a long time since I did one of these. It’s almost like I completely forgot I was doing this series! Well, anyways, with the new 2026 Arcade release, I wanted to call attention to a feature that has existed in Arcade for a couple years now but that nobody knows about. Today we’re going to learn how you can turn any Arcade project into an asset pack that people can use to import your sprites, tilesets, and more!
What is an Asset Pack?
An asset pack is a MakeCode Arcade extension that adds assets to the gallery section of one of the asset editors (e.g. tilemaps, tiles, images, animations, etc.).
Unlike traditional MakeCode Arcade extensions which add extra blocks or code, these extensions just add assets. Also unlike traditional extensions, making an asset pack requires no coding experience! Any project can be transformed into an asset pack and you don’t event have to switch to the JavaScript editor!
You also don’t need to use GitHub (though it might be a good idea, more on that later).
How to make an Asset Pack
Making an asset pack is super simple, and as mentioned above you can do it with any project. However, you can also start from an empty project if you prefer.
Step 1: Create some named assets
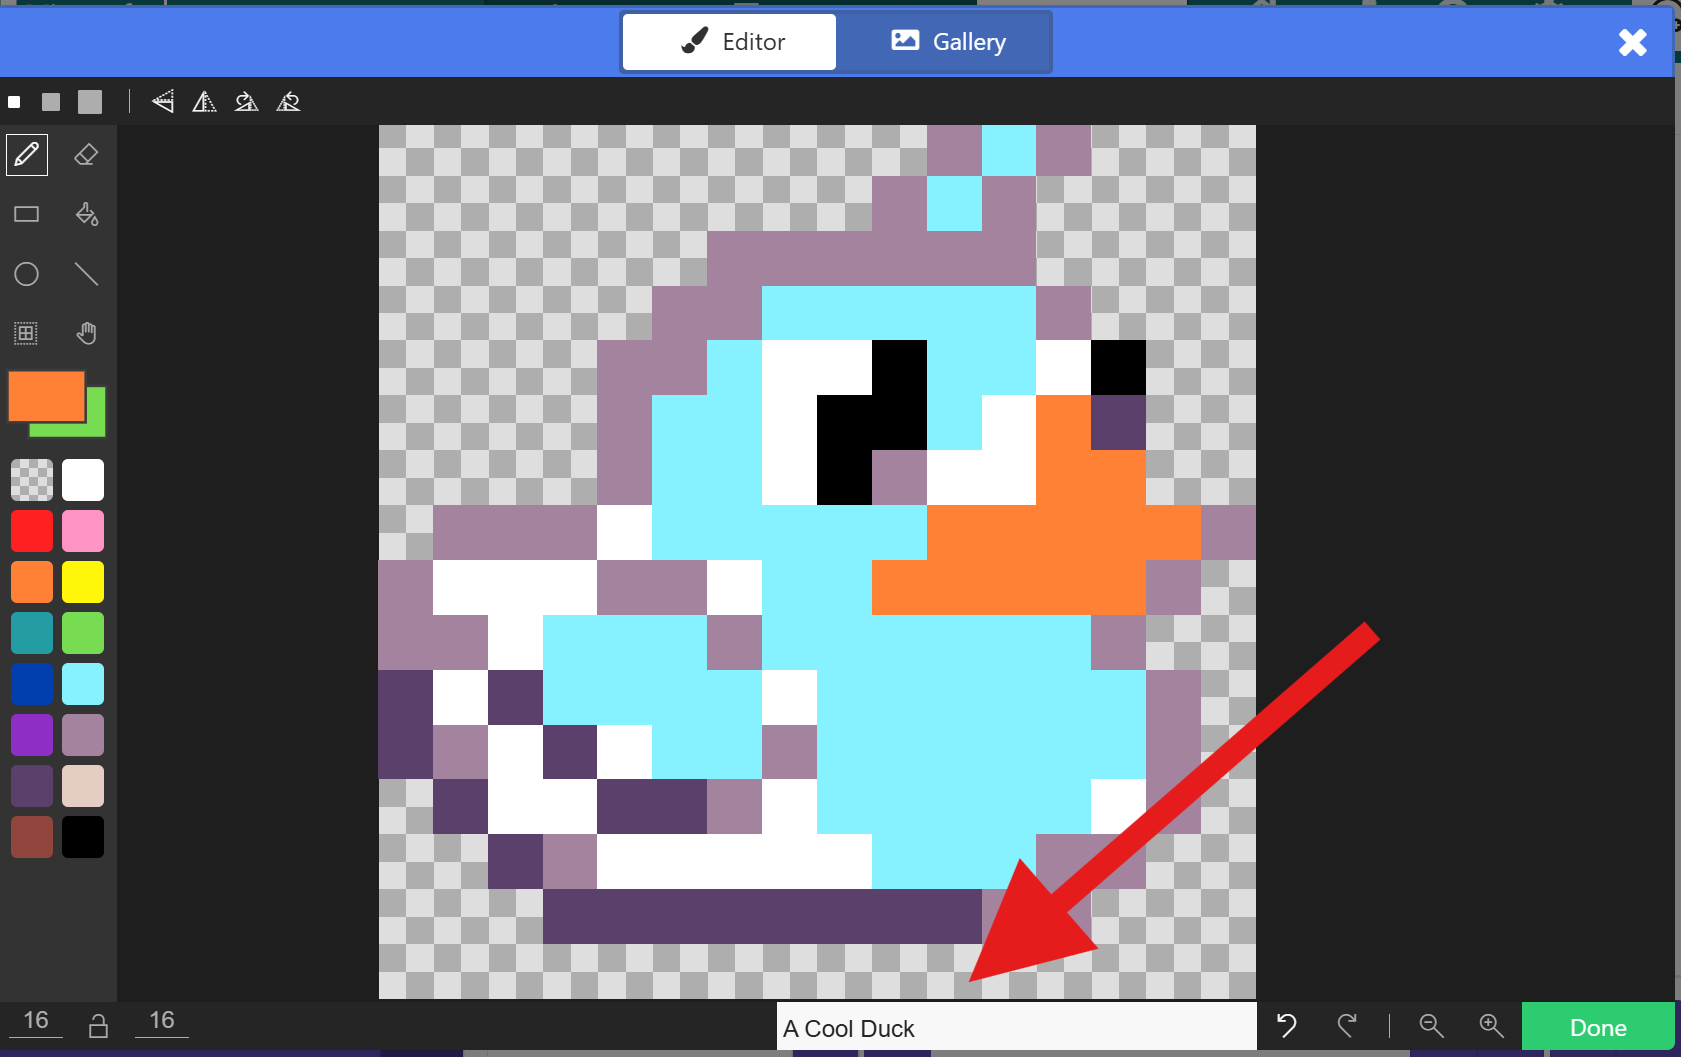
In order for assets to show up when someone adds your pack to their project, the assets have to be named. Tilemaps and tiles are automatically named when you create them, but images and animations that are created won’t have names unless you type 'em in. You can name your assets whatever you want, but people will see the names when they hover over your asset in the gallery so make sure it’s something descriptive!
To name an asset, make sure you type something in the box at the bottom of the image/animation/tilemap editor:
Step 2: Turn on the “Import as Asset Pack” project setting
First, you’ll need to open up the Project Settings page. You can find this inside the settings cogwheel in the top right of the editor:

Once you’re on the project setting page, make sure the “Import as Asset Pack” setting is turned on. You can tell if it’s turned on if the switch is moved to the right side and colored in like this:

After you turn that setting on, go ahead and click the “Go Back” button to return to your project.

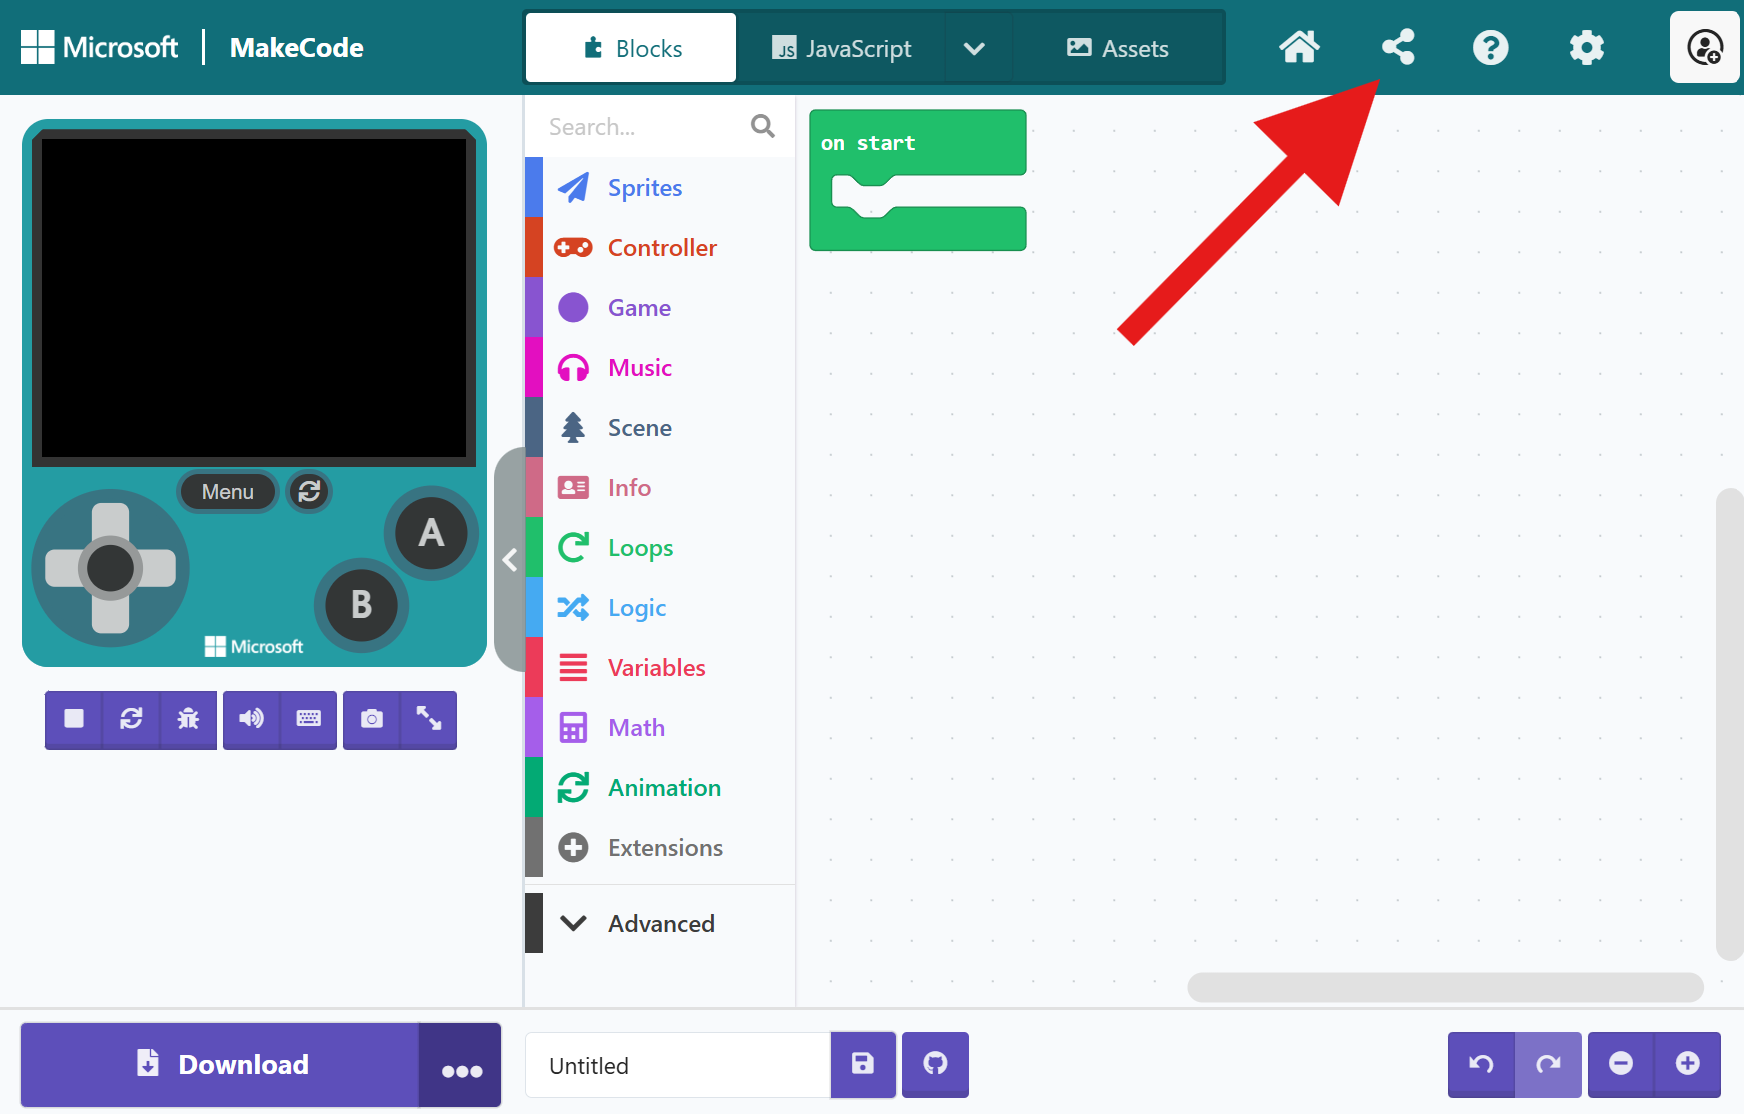
Step 3: Share your project
The final step is just to share your project! To create a share link, click the share button in the top-right of the editor:
Make sure you give your project a unique and descriptive name. People will also see your description when they add your asset pack to their project, so write something useful!
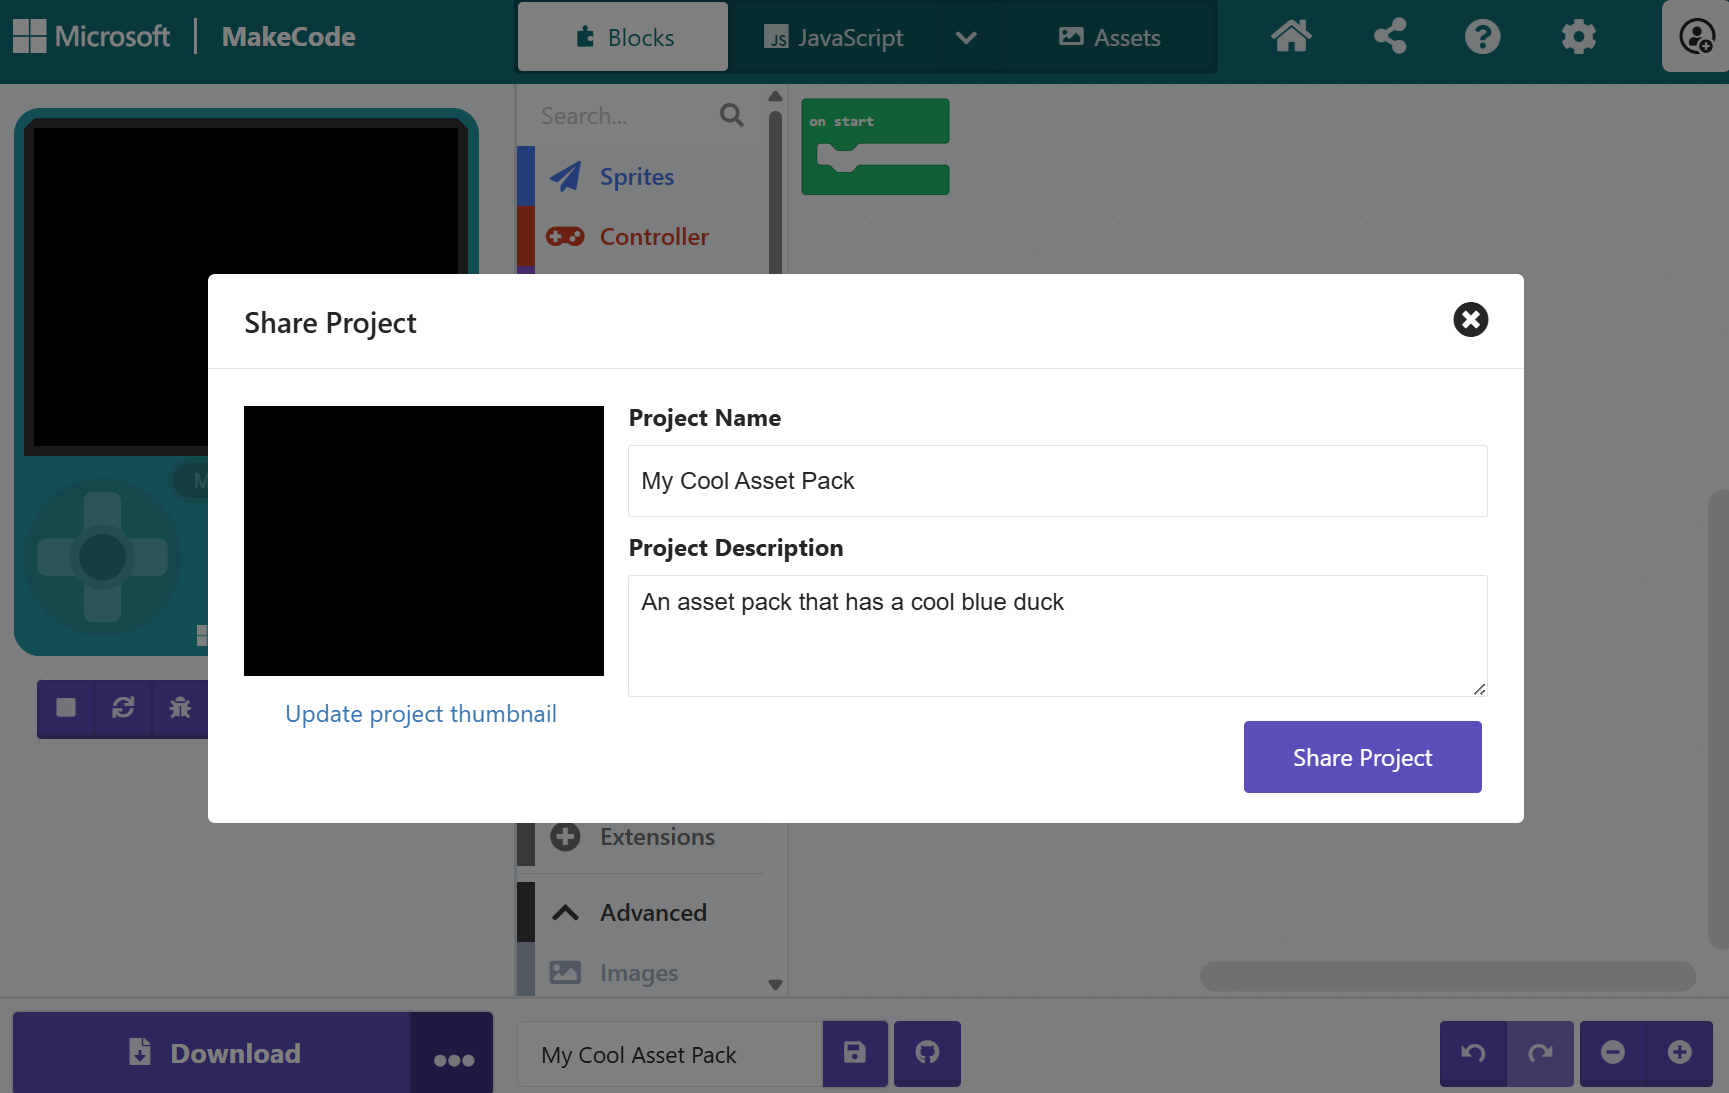
When you’re done, click share to get a link!
Pro Tip: create a thumbnail for your extension
Whatever thumbnail you record for your share link will show up in the Extensions dialog when someone goes to add your asset pack:

Before sharing your asset pack, try creating a little code that puts some of your assets on the screen! That way you can record a nice looking thumbnail that shows people what they’re getting.
Don’t worry, any code in your project won’t be added to the project of anyone who adds your extension, so feel free to go wild when creating your thumbnail!
Step 4: Post your link for people to use!
Once you have a share link, you’re done! Make sure you post that link somewhere where people can find it (maybe the show and tell section of this forum ![]() )
)
How to add an asset pack to your project
So, let’s say someone has given you a share link for an asset pack. How do you add that asset pack to your project so that you can use it?
It’s easy! Just paste that link into the extensions dialog like so:
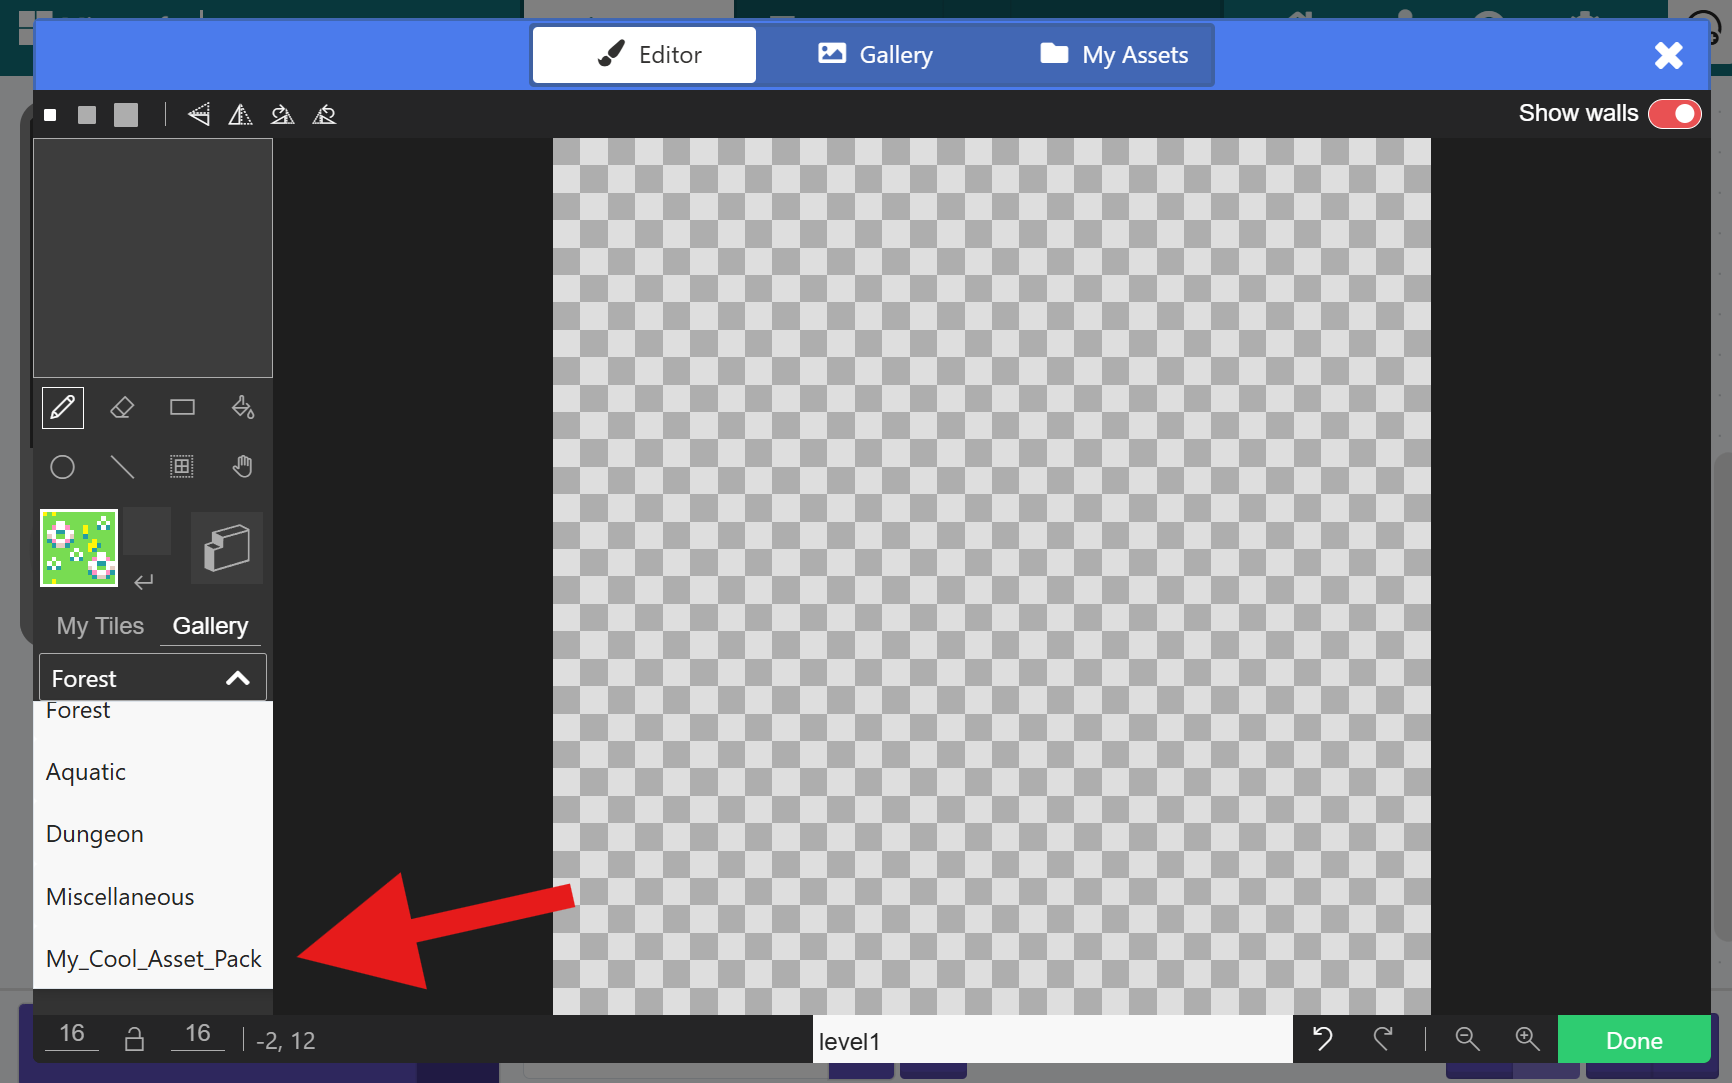
Clicking on the card that appears will add it to your project. Now, if you open up the gallery of the image/tilemap/animation editor, you’ll see the new assets right at the top:

Sharing tilesets
Just like other types of assets, you can also share tilesets for people to use in the tilemap editor! By default, if you share an asset pack with tiles then all your tiles will appear as a custom category in the Gallery dropdown of the tilemap editor tile palette.
Note that any characters other than letters, numbers, and underscores will get converted into underscores so avoid those when naming your extension.
You can also create multiple dropdown categories in your extension by naming your tile assets in a certain way: any text after a double dash (--) in your tile’s name will be taken as the category name.
For example, say I have a few tiles named like this:
tile1--WallTiles
tile2--WallTiles
tile3--FloorTiles
tile4--FloorTiles
When I add this asset pack to my project, there will be two new categories in the Gallery dropdown like so:

Sharing background images and dialog frames
If you want your asset packs to include images that show up in the set background image to * gallery, make sure to include “background” somewhere in the asset’s name. For example, “castle background”.
Similarly, to include images in the set dialog frame to * block from the Game category, include “dialog” somewhere in the asset’s name.
Get your asset pack into the recommended extensions
Is your asset pack amazing? So amazing that you think it deserves to appear in the recommended extension list for anyone to use? If so, you can submit a request to have it added!
Note: this section is a little more advanced and will require that you are somewhat familiar with GitHub and Pull Requests.
First, you’ll need to convert your asset pack to a GitHub repo. I’m not going to go into detail on how to do that here, but basically you’ll want to click the GitHub button in the bottom of the editor and log in with your GitHub account. Make sure the repo you create is Public, otherwise other people won’t be able to see it!
Once you have it in a GitHub repo, make sure you do the following things:
- Create a release. You can do this by clicking the “Create release” button
- Add a license to your repo. We only allow extensions that use the MIT license to be listed in the default extension list, so keep that in mind!
- Make sure that “Import as Asset Pack” is enabled

Once you’ve done that, you can open a Pull Request on the microsoft/pxt-arcade repository to add your extension to the list! You’ll want to add an entry to the “approvedRepoLib” property of targetConfig.json in that repo. Confused? Take a look at this PR someone created recently for their extension: https://github.com/microsoft/pxt-arcade/pull/7475
Someone from the MakeCode team will take a look at your PR and let you know if any changes need to be made!